Showing posts with label ice cream. Show all posts
Showing posts with label ice cream. Show all posts
Aug 27, 2010
Strawberry-Fudge Sundae Petit Fours
With these petit fours, a summer, all-American dessert classic is given a decadent spin.
 |
| I apologize for the backtrack in photo quality. I made and photographed these prior to getting my new camera. |
Reading through the August's Daring Bakers Challenge, all I could think of were ice cream sundaes. I'm stuck in the dead heat of a Texas August where, even with the AC running full blast, I break a sweat by sitting in a chair. August heat in Texas reminds me of that old horror film, The Blob, where an amorphous goo swarms over streets and buildings, devouring all in its path. Like "the blob," Texas heat is just something you can't run from, it will find you. [If the Fall showed its face a little earlier this year, I wouldn't complain].
What was I talking about? Oh right, the August 2010 Daring Baker's Challenge. The challenge was to create either a Baked Alaska or Ice Cream Petit Fours using a browned-butter pound cake and homemade ice cream. I was a tad let down, at first, since this challenge was so similar to last month's challenge - both essentially were ice cream cakes made with a special cake recipe and homemade ice cream. My attitude changed when I realized this was an opportunity to get a little creative and make something totally original using familiar components. Out of this the Strawberry-Fudge Sundae Petit Four was born. [I say that as if I've just broken new ground in the petit four universe, I doubt this is a first.]
What was I talking about? Oh right, the August 2010 Daring Baker's Challenge. The challenge was to create either a Baked Alaska or Ice Cream Petit Fours using a browned-butter pound cake and homemade ice cream. I was a tad let down, at first, since this challenge was so similar to last month's challenge - both essentially were ice cream cakes made with a special cake recipe and homemade ice cream. My attitude changed when I realized this was an opportunity to get a little creative and make something totally original using familiar components. Out of this the Strawberry-Fudge Sundae Petit Four was born. [I say that as if I've just broken new ground in the petit four universe, I doubt this is a first.]

I didn't know much about petit fours going into this, and I'm sure I've only had them once or twice if I don't count the Little Debbie versions I ate as a kid. [So far I have managed to squeeze Little Debbie references into my first two Daring Baker's posts, perhaps a subconscious obsession is surfacing]. Though, I did know petit fours were supposed to be attractive and, despite their minute appearance, pack a flavor punch. I formed my vision.
Against my obnoxious desire to experiment with ice cream flavors, I thought it best to stick with the vanilla ice cream recipe provided by the challenge. A vanilla scoop topped with a fudge, caramel or strawberry sauce is the ice cream sundae poster child, after all. These toppings would appear in the form of a second layer to be sandwiched in between the layers of pound cake. After listing any possible topping I could think of, the choices were narrowed down to two: a caramel sauce and strawberry sauce. Each cake would be wrapped in a chocolate glaze and would be topped with a whirl of buttercream to look like whipped cream and a strawberry or caramel drizzle for some added color.
The idea for two distinct sundae cakes became one when my local store didn't have melting caramels, and I didn't feel it that important to hunt them down. [Reason #2 the Fall needs to get here...the best food and flavors come with it.] Plus, doubling-up on strawberry sundae cakes wasn't a bad back-up. Additionally, the cake recipe yielded a smaller cake than I expected, which is what I get for not adequately reading the instructions before making my plans. At 9 x 9, making two sundae cake flavors would have been excessive.
The recipe for this pound cake called for the butter to be browned, essentially melted and boiled until it turned a dark chocolate color and smelled nutty. I haven't revealed this yet, but I've had no sense of smell for the past five years or so, and I always forget about it until times like these. So, going on sight alone, I successfully browned the butter. This additional step simply added a slightly nutty [surprise] flavor to the cake. The cake was otherwise what you would expect out of a pound cake - sweet, dense, rich, and yummy.

Separately, making the ice cream was no issue, even without an ice cream maker. It was at the start of the assembly that I began to see signs of trouble. With the ice cream spread into about a half-inch thick layer over the pound cake, it began to soften rather quickly. Softening gave way to some melting which led to an assembly that was difficult to finish. Quickly, I spread the strawberry sauce over the ice cream, covered it with the top pound cake layer, wrapped it tightly in cling wrap, and threw it in the freezer. This would be the first of many thaw and freeze rotations that did slightly damage the results.

Making the chocolate glaze, it came to my attention I didn't buy enough heavy cream and again, not wanting to go to the store, I used whole milk as a substitution. The milk thinned the glaze, making it more of a sauce. After failing to coat two cakes with the "glauce," and watching the pound cake just soak it up, I thwarted what could have been these cakes' swan song, drizzled the sauce over the tops, just as you'd do with fudge sauce on a sundae. Got the chocolate on and the look down.
Practically, I don't think the petit four was ever intended to be made with ice cream. [Adamantly Agree, Slightly Agree, Don't Care, Disagree, Adamantly Disagree?] With such a small amount of ice cream filling, each cake is prone to quick melting. If I served these on a party table they would have lost their form in a matter of minutes. However, these were still fun to create and I didn't hear any complaints from those who ate them. The cake was slightly dried out from the constant freezing, but each flavor came together to create a sweet, refreshingly cool experience that truly put a decadent spin on a classic treat.

Vanilla Ice Cream
- 1 c. whole milk
- A pinch of salt
- 3/4 c. sugar
- 1 vanilla bean, split lengthwise OR 2 t. pure vanilla extract
- 2 c. heavy cream
- 5 large egg yolks
- 1 t. pure vanilla extract
- Heat the milk, salt, and sugar in a medium saucepan until the liquid steams. Scrape out the seeds of the vanilla bean with a paring knife and add to the milk, along with the bean pod. Cover, remove from heat, and let infuse for an hour. If you do not have a vanilla bean, simply heat the milk, salt, and sugar in a medium saucepan until the liquid steams, then let cool to room temperature.
- Set up an ice bath by placing a 2-quart (2 litre) bowl inside a large bowl partially filled with water and ice. Put a strainer on top of the smaller bowl and pour in the cream.
- In another bowl, lightly beat the egg yolks together. Reheat the milk in the medium saucepan until warmed, and then gradually pour ¼ cup warmed milk into the yolks, constantly whisking to keep the eggs from scrambling. Once the yolks are warmed, scrape the yolk and milk mixture back into the saucepan of warmed milk and cook over low heat. Stir constantly and scrape the bottom with a spatula until the mixture thickens into a custard which thinly coats the back of the spatula.
- Strain the custard into the heavy cream and stir the mixture until cooled. Add the vanilla extract (1 teaspoon [5ml] if you are using a vanilla bean; 3 teaspoons [15ml] if you are not using a vanilla bean) and refrigerate until thoroughly chilled, preferably overnight.
- Remove the vanilla bean and freeze in an ice cream maker. If you don’t have an ice cream maker, you can make it without a machine. See instructions from David Lebovitz: http://www.davidlebovitz.com/archives/2007/07/making_ice_crea_1.html
Browned-Butter Pound Cake
- 19 T. unsalted butter
- 2 c. sifted cake flour (not self-rising; sift before measuring)
- 1 t. baking powder
- 1/2 t. salt
- 1/2 c. light brown sugar, packed
- 1/3 c. granulated sugar
- 4 large eggs
- 1/2 t. pure vanilla extract
- Preheat the oven to 325°F/160°C and put a rack in the center. Butter and flour a 9”x9” (23cmx23cm) square pan.
- Place the butter in a 10” (25cm) skillet over medium heat. Brown the butter until the milk solids are a dark chocolate brown and the butter smells nutty. (Don’t take your eyes off the butter in case it burns.) Pour into a shallow bowl and chill in the freezer until just congealed, 15-30 minutes.
- Whisk together cake flour, baking powder, and salt.
- Beat the brown butter, light brown sugar, and granulated sugar in an electric mixer until light and fluffy, about 2 minutes. Beat in the eggs one at a time, mixing well, and then the vanilla extract.
- Stir in the flour mixture at low speed until just combined.
- Scrape the batter into the greased and floured 9”x9” (23cmx23cm) square pan. Smooth the top with a rubber spatula and rap the pan on the counter. Bake until golden brown on top and when a toothpick inserted into the center comes out clean, about 25 minutes.
- Cool in the pan 10 minutes. Run a knife along the edge and invert right-side-up onto a cooling rack to cool completely.
Chocolate Petit Four Glaze
- 9 oz. dark chocolate, finely chopped
- 1 c. heavy cream
- 1 1/2 T. light corn syrup, Golden syrup, or agave nectar
- 2 T. vanilla extract
- Stir the heavy cream and light corn syrup in a small saucepan over medium heat until it comes to a boil. Remove from heat and add the dark chocolate. Let sit 30 seconds, then stir to completely melt the chocolate.
- Stir in the vanilla and let cool until tepid before glazing the petit fours.
Strawberry Sundae Sauce
- 1 c. water
- 1/2 c. sugar
- 1 c. strawberries, diced
- 2 t. lemon juice
- 3 T. corn starch
- Dissolve sugar into the water over high heat, stirring frequently, making a simple syrup.
- Add strawberries to the boiling mixture and reduce heat to simmer. Simmer strawberries in the mixture for five minutes.Stir in lemon juice.
- Pour strawberry mixture through a sieve to and return the liquid only to the stove. Reserve simmered strawberries to add back to sauce later or throw away.
- Combine corn starch with 1/3 cup cold water and stir until dissolved. Add corn starch mixture to the strawberry liquid. Stir frequently, bringing mixture to a boil. Continue stirring until the mixture thickens to desired consistency. For a thinner sauce, use 2 T. of corn starch.
- Stir in reserved strawberries if desired.
The August 2010 Daring Bakers’ challenge was hosted by Elissa of 17 and Baking. For the first time, The Daring Bakers partnered with Sugar High Fridays for a co-event and Elissa was the gracious hostess of both. Using the theme of beurre noisette, or browned butter, Elissa chose to challenge Daring Bakers to make a pound cake to be used in either a Baked Alaska or in Ice Cream Petit Fours. The sources for Elissa’s challenge were Gourmet magazine and David Lebovitz’s “The Perfect Scoop”.
Aug 26, 2010
Banana Ice Cream
Ripened bananas are put to good use in this sweet, creamy ice cream with hints of vanilla and cinnamon.

So, needless to say, while an open schedule allowed me to spend a lot of time in the kitchen in August, this new schedule is going to force me to make time for it. I thrives when juggling multiple projects and activities, and I suspect that taking classes, working on a show (if cast), and continuing to explore new things in the kitchen/developing photography skills will give me better results on all fronts. I like my down time, but too much idle time leads to an excessive laziness that I am very uncomfortable with.
Onto today's recipe. This ice cream developed from a situation I think everyone is all too familiar with - bananas ripening faster than they are eaten. I love bananas, but if I could change one thing about them, I'd double their shelf life. Buying bananas starts a race against the clock to eat the bunch before they get too many brown spots - I usually lose. The next plan of attack - finding recipes that make the best use of ripened bananas. Banana bread is always reliable, but for the amount of ripened bananas I end up with, I would be making banana bread about once every two weeks...and I get tired of eating the same thing repeatedly.

Back in July, I made homemade ice cream for the first time - without the use of an ice cream maker. I would never have done this if it weren't for the July Daring Baker's Challenge. The challenge opened a Pandora's Box, but I had to wait until now to buy an ice cream maker. First up - inspired by the withering bananas begging to be used - is this Banana Ice Cream. Until recently, I've been skeptical of using banana as a primary flavor in food, but I think this is just a delusion I formed when eating the banana flavored Laffy Taffy as a kid. [To be fair, I doubt there was any hint of real banana in this.] Actually, ripened banana is great for baking since, as it ripens, the starches convert to sugars and the fruit softens. It becomes a perfect natural sweetener and is easily mashed and mixed. True banana flavor compliments rather than overpowers, which is the case for the Banana Ice Cream. With hints of vanilla and cinnamon, banana is just one flavor on the palette. It'll chill the body and sweeten the soul.
Personally, I am far from perfecting the art of homemade ice cream. I did not let my churning bowl freeze long enough and thus the ice cream maker only slightly thickened my mixture. After a few tries, I had to freeze it to get the consistency of actual ice cream. As such, the finished ice cream had a frosty quality and did not hold as perfectly would be desired. But, this was my fault for not being patient. Still, I loved the flavor, and this will likely become a base for some interesting ice cream concoctions in the future. [Can anyone say Bananas Foster Ice Cream.]

Banana Ice Cream
Slightly modified from Our Best Bites

- 4 ripened bananas, sliced into 1/2 inch segments
- 1/4 c. white or brown sugar (I used white because its what I had on hand)
- 3 t. cinnamon
- 1 T. butter (optional, I did not use)
- 2 c. heavy cream
- 1 c. whole milk
- 1/2 c. white sugar
- 1/4 t. salt
- 2 t. vanilla
- Preheat oven to 400 F.
- Toss banana slices in 1/4 c. sugar, butter and cinnamon. [This seems like a lot of cinnamon, but the final flavor does not overwhelm.] Spread banana slices over a baking sheet lined with aluminum foil. Bake for about 15 minutes, turn banana slices and bake for 15 more minutes. Allow to cool completely.
- While bananas cool, whisk together cream, milk, sugar, salt and vanilla until sugar is fully dissolved. Cool in fridge.
- Place fully cooled bananas in a food processor/blender with 1/2 c. of the cream mixture. Blend until completely pureed. Add another 1/2 c. of cream mixture and blend again until combined.
- In a large pan, pour pureed banana mixture into the rest of cream mixture and whisk until fully combined. Chill entire mixture in refrigerator.
- Follow manufacturers instructions to churn in an ice cream maker. If you do not have an ice cream maker, pour mixture into a freezer-safe container. Freeze, stirring every two hours until fully frozen.
Aug 3, 2010
Venison, soup and pizookie...oh my.
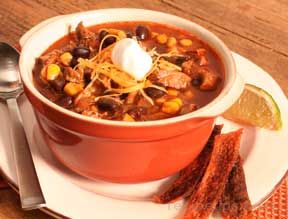
This post brings quite an assortment of recipes. The recipes included in this post: Southwest Venison Roast, Chipotle-Cream Sauce, Tangy Chicken Rice, Ancho Chicken Tortilla Soup, Crispy Tortilla Strips, Peanut Butter Ice Cream, Dark Chocolate Pizookie Base, and Simple Fudge Sauce.
Coming home from my weekend with the family, I wanted to find some recipes that would yield multiple meals for the week. I knew I was in possession of a venison roast, given to my parents by my uncle and passed on to me since they aren't the biggest venison fans. I decided it was time to cook it up. I kept the the seasonings simple, but wanted a southwest flavor - in my book TexMex never fails.
Southwest Venison Roast
- 1 venison roast
- olive oil
- salt, pepper, chili powder
1. Preheat oven to 400 F.
2. Coat roast with olive oil. Rub with salt, pepper and chili powder. Cook at 400 F for 30 minutes. Reduce heat to 375 and continue until cooked to desired temperature. About 1 hour and 15 minutes yields a tender and juicy roast cooked between medium and medium well. Be sure to baste the roast with the juices periodically throughout cooking to avoid drying out the roast.
 |
| Venison roast, not the one I made, but similar. Photo courtesy of BBCGoodFood.com |
To compliment the roast, I wanted something with a little spice. The smoky flavor of the chipotle is a great addition to almost any meat and I knew it would go well with the venison. I sorted through several recipes and chose a Chipotle-Cream Sauce. The sauce had a nice roasted spice that was cut by a smooth creamy texture. Indeed, the sauce worked perfectly with the roast, and gave it an extra dimension. I modified the recipe and replaced half of the whipping cream with whole lactose-free milk to meet the dietary needs of a friend. Doing so eliminated some of the lactose, but maintained a creamy texture when heated. As far as I was concerned, no effect of the sauce was lost.
Chipotle-Cream Sauce
Courtesy My Recipes
- 1/3 c. chopped onion
- 2 T. chopped roasted red bell pepper, canned
- 1 1/2 t. chopped garlic
- 2 T. butter or margarine
- 1/4 T. ground cumin
- 1/4 c. fat skimmed chicken broth
- 2 T. canned chipotle peppers in adobo sauce, seeds and veins removed
- 1 c. whipping cream
1. Combine onion, bell pepper, garlic, butter/margarine, and cumin in a 10-12 inch frying pan. Sauté until onion is limp, about 6-8 minutes.
2. Whirl mixture in a food processor/blender with broth and chipotles.
3. Scrape mixture back into frying pan. Add cream and stir over high heat until simmering, allow to simmer about 3 minutes.
Rice seems to be my default side for a meal like this. It is simple to prepare - given you have the time - and it is a side that can be tailored to the flavors of the meal. Typically, a tomato-based Spanish rice is surefire side for any Mexican or Southwest entree, but since I also served a tortilla soup with a strong tomato presence, I opted to take the rice in a different direction.
Tangy Chicken Rice
- 1 c. brown rice
- 2 c. water
- 1 chicken bouillian cube
- 1 tomatillo, finely chopped
- 1 1/2 t. cumin
- 1 T. lime juice
1. Bring rice, water, and bouillian cube to a boil over high heat.
2. When water is boiling, add the chopped tomatillo. Cover and simmer for about 30-40 minutes, stirring occasionally.
3. Add cumin and lime juice to fully cooked rice.
I also decided this weekend that I wanted to make a tortilla soup. I'm not the biggest soup fanatic, but every now and then I do crave a good, hearty soup. Plus, for me, one soup equals lunch for a week. I decided I'd make a soup that could be served before the roast and rice and chose Rachel Ray's Ancho Chicken Tortilla Soup. The soup was fantastic and had a robust tangy-savory flavor. It seemed to be a common complaint under the recipe's comments that the Ancho chiles were hard to find and I too was not able to find them at my local store. In place of the Anchos I added 2 red chiles to the the chicken stock and skipped adding them as later instructed. A user suggested also adding a second jalepeno and the juice of an extra lime to adjust the flavor. The result was a soup that hit multiple flavor notes - I was intrigued when I saw cinnamon and honey on the ingredients list. I'd like to get my hands on some Ancho chiles to taste the recipe in its original form.
 |
| Rachel Ray's recipe had no picture, but this is a similar finished look. |
Ancho Chicken Tortilla Soup
Recipe created by Rachel Ray
- 2 large ancho chiles, seeded and stemmed
- 1 quart chicken stock
- 2 T. vegetable oil
- 2 ears corn on the cob, husked, kernels removed (or 1 c. frozen kernels, defrosted)
- 1 large red onion, chopped
- 1 jalepeno chile, seeded and finely chopped
- 1 red chile pepper, seeded and finely chopped
- 2 cloves garlic, finely chooped
- 1 t. ground cumin
- 1 1/2 t. smoked paprika (I used regular)
- 1/2 t. ground cinnamon
- 1 can (28 oz.) diced or crushed fire roasted tomatoes
- 1 T. honey
- 1 rotisserie chicken, skinned and shredded
- salt and ground black pepper
- 1 to 2 cups water, to thin soup to liking
1. Add ancho chiles and chicken stock to a large pot and bring to a boil. Reduce heat to low and simmer until chiles are tender. Remove from heat and cool.
2. Meanwhile, heat a medium soup pot with vegetable oil over high heat. Add corn and sauté until charred on the sides, about 3-5 minutes. Reduce heat slightly and add onions, jalepeno, red chile pepper and garlic. Add cumin, paprika and cinnamon. Sauté for 5 minutes. Then stir in roasted tomatoes.
3. Puree ancho and chicken stock in a food processor/blender. Stir into tomato mixture.
4. Mix in honey and shredded chicken, season with salt and pepper to taste. Thin the soup with water to taste and desired consistency.
5. Zest and juice one lime and add to soup pot.
Crispy Tortilla Strips
- 6 wheat tortillas, cut into bite sized strips
- olive oil cooking spray
- chili powder
- salt
1. Preheat oven to 350 F.
2. Line the bottom of a baking sheet with aluminum foil. Spray with olive oil spray.
3. Spread out tortilla strips on baking sheet. Sprinkle with chili powder and salt. Lightly spray tops of strips with olive oil spray.
4. Bake for 8-10 minutes, allow 5 minutes to sit on counter so the strips get crispy.
For dessert, I made a chocolate pizookie (pizza-cookie) with homemade peanut butter ice cream and topped with a fudge sauce. The Dark Chocolate Cookie and Peanut Butter Ice Cream are courtesy of Cherry Tea Cakes, a mouthwatering dessert blog created by Jana of Washington D.C. Again, I used lactose-free milk along with the cream successfully. Since I am new to the blogging word, and don't know the proper etiquette pertaining to the use of other bloggers' food photos, you can check the links above to see her mouthwatering photos. Click with caution as you will likely find yourself scouring the recipes she has posted. Thanks Jana for the fantastic recipes.
Creamy, nutty and sweet, this is everything ice cream is a rich frozen treat that is an excellent companion for a chocolate cookie. I love peanut butter and always wondered why its never had its own ice cream flavor. I suppose it is a flavor that begs to be paired, but I had no problem eating it by itself.
Peanut Butter Ice Cream
Recipe courtesy of Jana at Cherry Tea Cakes
- 1 c. milk
- 1 c. sugar
- 2 t. vanilla
- 5 egg yolks
- 1 1/3 c. heavy cream
- 1 1/2 c. peanut butter (smooth or chunky)
2. Lightly whisk eggs in a stand mixer along with the sugar, then add scalded mixture in a slow stream on a low speed. Pour back into saucepan and cook over medium heat, stirring constantly with a wooden spoon. Add 1 cup of the peanut butter. *Here Jana suggests reserving the other 1/2 c. to stir in the finished ice cream to create a swirl. I used added the 1/2 c. along here, foregoing the swirl.
3. Pour custard through a fine-mesh sieve if you would like a non-chunky peanut butter ice cream. Chill mixture.
4. Follow the manufacturer's instructions for an ice cream maker. If you have no ice cream maker, place in a freezer-safe container and cover with aluminum foil. Freeze for 6-7 hours, stirring the mixture ever hour and a half to two hours.
On Epicurious, the following recipe is known as a Dark Chocolate Cookie, but I feel the result doesn't quite match the feel of a cookie. To me it was more of a cakey brownie - a rich, dense flavor with a slight airy quality. On its own, the chocolate flavor is strong, but rather one-note. I decided to establish this as a pizookie base; when used with other flavors, it adds a great dimension to the dessert. In this case, the peanut butter ice cream was perfect with it.
Dark Chocolate Pizookie Base
Recipe provided by Cherry Tea Cakes, originating from Epicurious
2. Beat together butter and sugar with an electric mixer until pale and fluffy, then beat in eggs and vanilla until combined.
3. Whisk together dry ingredients in a bowl.
4. Add flour mixture to butter mixture until well combined.
5. Bake in either a parchment-lined pan or divide batter between several oven-safe bowls for individual servings. *I used a 10.5 x 7 baking pan. Using a larger pan will result in a thinner cake-base, which I would have preferred. Bake 7-10 minutes, depending on desired texture.
Finally, since I had baked my base perhaps a minute too long, I decided to add a fudge sauce to the add a little moisture to the dessert. Between the chocolate base, peanut butter ice cream and the fudge topping, this was one filling dessert that had the "grandiose" quality you'd find in a restaurant.
Simple Fudge Sauce
Recipe provided by Sunita for the The Daring Baker's July Challenge
Dark Chocolate Pizookie Base
Recipe provided by Cherry Tea Cakes, originating from Epicurious
- 3/4 c, all-purpose flour
- 3/4 c. unsweetened cocoa powder
- 1/2 t. baking soda
- 1/2 t. kosher salt (I used sea salt I had on hand)
- 1 1/2 sticks unsalted butter, softened
- 1 c. sugar
- 2 large eggs
- 1 t. vanilla
2. Beat together butter and sugar with an electric mixer until pale and fluffy, then beat in eggs and vanilla until combined.
3. Whisk together dry ingredients in a bowl.
4. Add flour mixture to butter mixture until well combined.
5. Bake in either a parchment-lined pan or divide batter between several oven-safe bowls for individual servings. *I used a 10.5 x 7 baking pan. Using a larger pan will result in a thinner cake-base, which I would have preferred. Bake 7-10 minutes, depending on desired texture.
Finally, since I had baked my base perhaps a minute too long, I decided to add a fudge sauce to the add a little moisture to the dessert. Between the chocolate base, peanut butter ice cream and the fudge topping, this was one filling dessert that had the "grandiose" quality you'd find in a restaurant.
Simple Fudge Sauce
Recipe provided by Sunita for the The Daring Baker's July Challenge
- 1 c. sugar
- 3 T. unsweetened cocoa powder
- 2 T. cornstarch (use a little less for a thinner sauce, a little more for a thicker one)
- 1 1/2 c. water
- 1 T. butter
- 1 t. vanilla
1. In a small saucepan, whisk together the sugar, cocoa powder, cornstarch, and water.
2. Place pan over high heat and stir constantly until it begins to thicken and smooth. This will happen suddenly within 2-3 minutes.
3. Remove from heat and mix in butter and vanilla. Allow to cool or serve warm.
To assemble the pizookie: place a piece of the chocolate base in a bowl, then add a scoop or two of peanut butter ice cream. Lastly, top with the desired amount of fudge sauce.
Jul 27, 2010
Swiss Roll Ice Cream Fudge Bombe
Layers of homemade vanilla and chocolate ice creams and a fudge sauce are hidden underneath a dome of creme-filled chocolate cake rolls.
I knew when I signed up to participate in the Daring Baker's Challenges that this month, my inaugural month with the website, would be a busy one. My Summer school session just wrapped and plunged me into two straight weeks of rather dense studying for my law finals. During finals, the right side of my couch becomes my living quarters as I pour through notes, outlines and books for each class. Eating becomes merely a survival tactic and thus, the lack of posts this month.
Additionally, the moment finals ended last week, I had to begin packing for a move. I've lived on my own since starting law school in February '09, but have decided to move in with some good friends. Still, it's amazing how much crap one guy has been able to fit in a one-bedroom apartment. Moving certainly makes you take stock of your belongings, and I've learned I've got tons, but none of it is worth anything.
I could have sat this one out, but wasn't about to use one of my free passes on my first round out of the gate. So, amidst packing boxes, I made the Swiss Roll Ice Cream Fudge Bombe - as I only know to call it. I'm usually the impatient sort who doesn't cook things which spread the preparation across multiple days. I usually don't think that far ahead and find myself cooking something when I crave it. Though the multi-phase nature of this dessert was much friendlier to my schedule. This is one rich dessert, and way easy to make, despite the seemingly foreboding components.
I was particularly nervous about making my own ice cream. I've never owned an ice cream maker, and I've only had homemade ice cream once or twice. It was poorly made. So, I thought for sure, I was going to mess this up. Truth is, this was so easy a kid could do it, with minimal supervision. If you can mix things in a bowl, you can make homemade ice cream - without an ice cream maker. After you put it in the freezer, just be sure you stir it every 2 hours or so until it is fully frozen. I suppose that is the benefit of an ice cream maker, it constantly churns the ice cream while it freezes. Still, the ice cream recipes were simple and tasty. I'll look forward to experimenting with different flavors in the coming, HOT, Texas months. I'm also anticipating homemade versions of my favorite fall flavors - pumpkin and cinnamon anyone?
As a kid, I loved the Little Debbie Swiss Cake Rolls. My mom usually had a box of them - or the oatmeal cookies - in the house for our lunches and I was the geeky kid who ate it in phases, enjoying every bite. I'd first eat the chocolate ganache enveloping the cake. Then, I'd unroll it, lick the creme filling off before eating the cake itself. I ate each cake carefully, as if it might explode at any given moment. Actually, I started a trend among my friends who, prior to seeing the way I ate the Little Debbie's, would finish their cakes in two bites. With such a fond childhood memory, you'd think I would have made the connection sooner, but alas, it wasn't until I was rolling the cake in the sugar-coated towel that I realized I was making my own large, homemade Little Debbie Swiss Cake Roll. I suppose my mind had been ravaged by finals and the moving process. The parchment paper did not peel away quite as easily as it seemed to in the pictures Sunita provided, but, I managed to get it all off without tearing apart the cake. I still had a solid rectangle of cake to roll. I'm not sure if this was the result of baking too long or perhaps a measurement in the cake was off, but it was only a minor glitch.
While rolling the cake, I half expected it to just crumble beneath my fingers. I don't know, the doomsdayer in me felt that I had successfully made the ice cream, so I was bound to get something wrong and this seemed like the next logical thing. But, the cake rolled nicely both when using the towel and again when I actually frosted it with the creme filling.
As of this writing, I have not tasted the assembled dessert. I am bringing it to my family in Dallas in a few days. However, I can't imagine that this classic chocolate-vanilla combo is anything but delicious.
Note: I halved the entire recipe - making one cake (10 rolled slices), one cup of each ice cream, and about 1/2 cup of fudge sauce.
Note 2: My apologies for the one measly photo included in this post. At the time this was taken all my kitchenware was packed in boxes, and foil was what was sitting around. I also chose not to take photos of the steps to save myself some time. I am likely going to invest in a camera this next month and promise more attractive photos in the future.
[Due to the hectic schedule outlined above, I've not taken the time to include the recipes for this dessert. Instead, I've attached the link you can visit to get the skinny on making this Bombe. See Swiss Swirl Ice Cream Cake]

Swiss Roll Ice Cream Fudge Bombe
The July 2010 Daring Bakers’ challenge was hosted by Sunita of Sunita’s world – life and food. Sunita challenged everyone to make an ice-cream filled Swiss roll that’s then used to make a bombe with hot fudge. Her recipe is based on an ice cream cake recipe from Taste of Home.
Subscribe to:
Posts (Atom)